

How To Install New Basement Window
An aging basement window can create all manner of problems. If it's letting in moisture it can damage your walls and interior. And if it's no longer opening smoothly, it can leave your basement hot and stuffy.
Fortunately, there's no need to live with those difficulties! Follow our guide on how to replace a basement window, and your basement will be secure and weatherproof once more.
So what will you need for the job?
Tools and equipment for Basement Window Replacement
- Thick gloves
- Tape measure
- Pry bar
- Reciprocating saw
- Wooden shims
- Spirit level
- Utility knife
- Hammer
- Cold chisel
- Broom or vacuum cleaner
- Drill – you'll need one with hammer action if you're installing the window in a concrete wall
- Stainless steel or galvanized screws – if the wall is concrete, you'll need double-threaded concrete screws
- Exterior caulk and caulk gun
- Expansion foam
- Primer for exterior use
- Paintbrush
How to Replace a Basement Window
Step 1: Measure for your new window
Don't start taking out your old window before you have your new one! New windows may take several weeks to arrive. You don't want to find yourself with a cold and insecure gap in your wall until they do!
Check to see whether or not you need to remove the frame. If it's just the glass that's damaged, you can replace it while leaving the frame in place. In that case, just measure the height and width of the glass.
But if the frame has rotted, warped or rusted, you'll need to take it out. Measure both the height and width of the frame.
If you can't get a frame the precise size you need, go for one that's a little smaller. You can fill the gap with foam when you install it.
Pro tip: When measuring the frame, make sure you do it from the inside of the room. Some sills have an incline, so if you measure from the outside, you may get the wrong sized window.
Step 2: Remove your old window
Now let's get rid of that old window. Put on a pair of thick gloves to protect your hands before you start work.
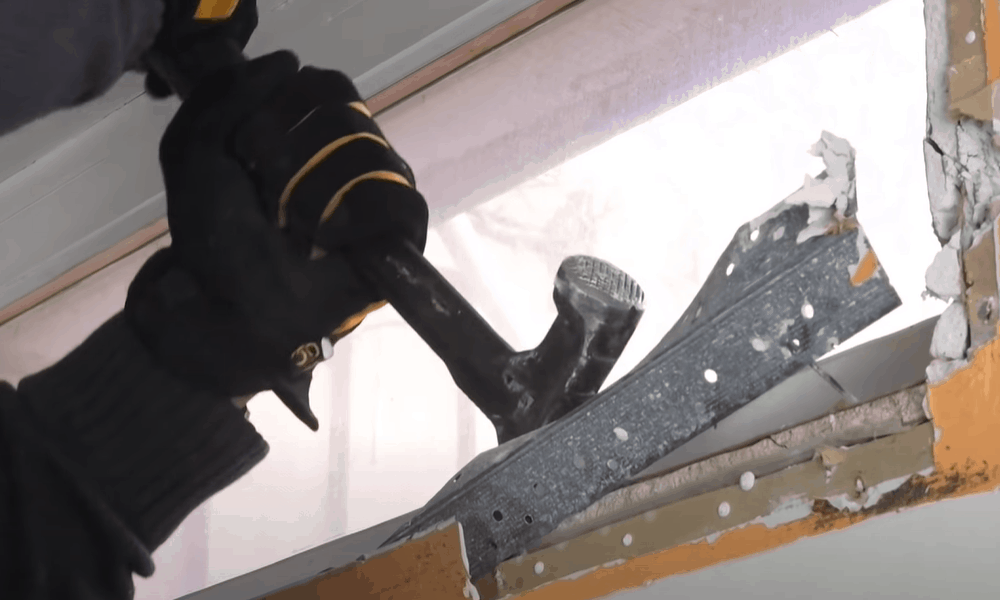
If it's a wooden framed window, you'll be able to do this using a pry bar. Lever away the frame and sash from the wall. Then take your reciprocating saw. Use it to cut through between the frame and the wall studs. You'll now be able to remove the window.
If you're working with a metal-framed window in a concrete wall, the process needs to be a bit different.
Check whether it's been screwed in place or secured with rivets. It there are screws, remove them using a drill or electric screwdriver. If rivets have been used, drill them out. You'll now be able to pull the frame-free from the recess.
Pro tip: If your window is letting in a draft but is otherwise in good condition, there's no need to replace it. Simply buy and install a rubber gasket to get rid of the draft.
Step 3: Clean up the hole
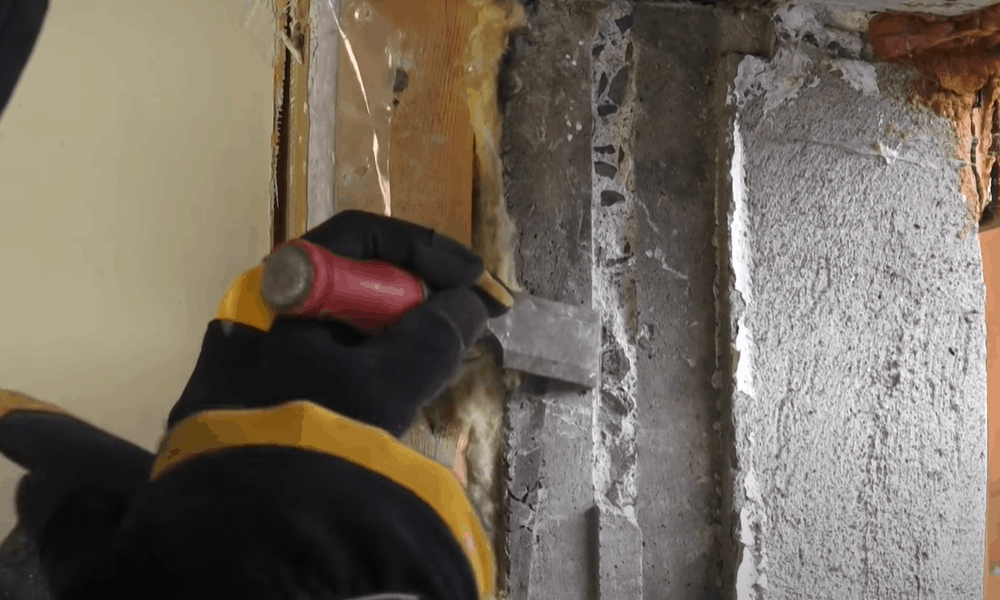
Look out for any ridges of concrete where the window will go. If the concrete was poured after the original window was installed, for example, there'll be a ridge you'll need to remove. Take your chisel and hammer it out.
Now get rid of any debris. Either sweep it away with a broom or use a vacuum cleaner to suck it up.
You're now ready to put your new window in place.
Step 4: Get your new window in position

Place your new window into the hole.
You want it to be close to the bottom sill but leaving a little space for insulation. To achieve that, push a couple of wooden shims below the lower edge of the frame. They don't need to go all the way through to the outside. They're just there to provide a little extra room.
Use your spirit level to check that the window is horizontal. If it isn't, adjust the position of the shims until it is.
Pro tip: Shorter prefabricated windows will be perfectly square, so there's no need to check the vertical alignment too. If your window is two feet tall or higher, though, use your level to check the sides are straight as well.
Step 5: Screw the window in place
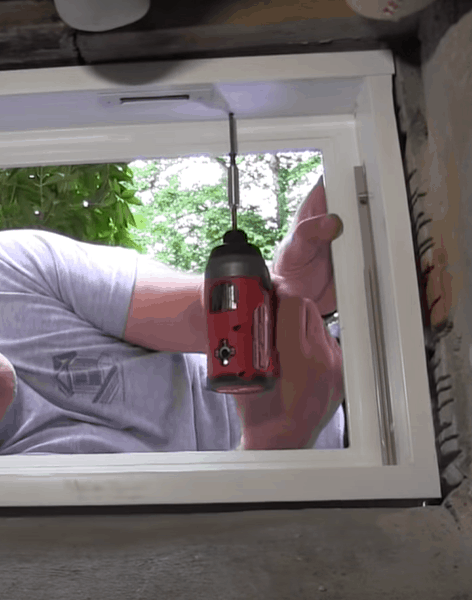
You could rely on the expansion foam to hold your window in place. However, screwing it in will always keep it more secure.
Start by removing the screen and sash from the window. This will give you more room to work and make it easier to reach the holes for the screws.
If you've got a wooden frame and drywall, use stainless steel or galvanized screws. If you've got a concrete wall, you'll need the power of a drill with hammerhead action. Use it to make your hole, then screw in double threaded screws specially designed for concrete.
Some windows will come with covers to go over your screws. If yours has those, put them in place now.
Step 6: Apply expanding foam
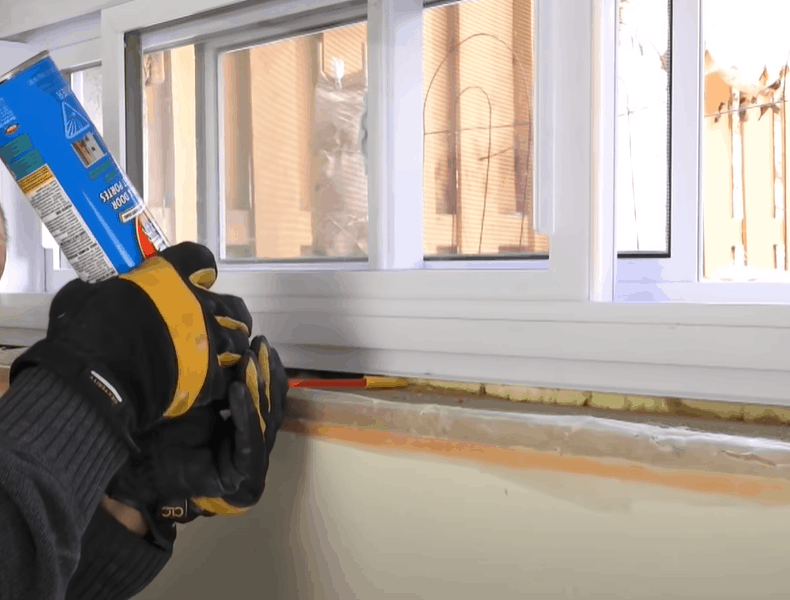
Check that your can of expanding foam is suitable for use with windows and doors. You want the type that's labeled "low expansion".
As the name suggests, high expansion foam will expand more. That will put too much pressure on the window. As a result, it will be difficult to open and can even cause the window to bow.
With the can in a vertical position, give it a good shake to mix the contents. Then apply it evenly through the nozzle to the gap between the frame and the walls.
You don't need the foam to come to the front of the window. The aim is to insulate the glass.
Close and lock your window while you're waiting for it to dry.
Pro tip: Move ahead of the nozzle at a steady pace. This will help you apply the foam with an even consistency.
Step 7: Replace the caulk around the outside of the window

Now that the new window is in place, it's time to go outside. Take your utility knife, caulk, and calk gun with you.
Use the utility knife to remove any old caulk from around the exterior of the frame.
Make sure your caulk is suitable for exterior use. It also needs to bond to your brick or stone wall, as well as your wooden or metal window frame. Check that it's rated for the temperatures it will be exposed to. If you're in an area with very cold winters, you'll need a specialist product.
Now slice off the top of the nozzle of the caulk bottle. Cut at the point on the nozzle where it will give you the right-sized bead of caulk. Cut at an angle to make it easier to apply.
Puncture the seal on the inside of the caulk bottle and place it in your caulk gun.
Apply the nozzle to the bottom corner of the window and move it slowly along the lower edge. Then apply around the sides and top of the window too.
Pro tip: Exterior caulk, particularly that designed for colder temperatures, isn't easy to work with. Take your time to apply it. You want the rear edge of the nozzle to smooth the caulk as you go. Don't try to smooth it with your fingers – you'll just make a mess.
Step 8: Prime your window frame

If your window has a metal frame, your work here is done. But if it's made of wood, you'll need to prime it to protect it from the elements.
Make sure your primer is suitable for use outdoors. Apply it in a thin, even coat using your paintbrush. Leave it to dry for as long as it says on the tin.
When the primer is dry, you can leave it as it is. Alternatively, give the frame extra protection with a couple of coats of exterior paint.
Extra tips for replacing basement windows
Remember that it isn't always necessary to replace the whole window. If the frame is undamaged, consider using weatherstripping to cut out drafts. Any glass that's cracked or broken can also be removed whilst leaving the frame intact.
If you have replaced the whole window, a good final step is to cut a bevel into the ledge underneath. That will help water drain away and keep the frame in good condition for longer.
If you're replacing a window that's used as an emergency exit, you'll need to follow particular rules. You'll need to have a sketch of your new window, showing all the dimensions. Take this to your local building inspection authority and get a permit before you start work.
Ready to get started?
We hope you've enjoyed our step by step guide to how to replace a basement window. Take your time, and make sure your primer and caulk are both suitable for exterior use. Remember to check the specifications to see what temperature range they will tolerate.
If you've replaced your basement window, we'd love to hear how it went. And if you've got your own top tips, why not comment and share them with us?
Good luck with your next project!
How To Install New Basement Window
Source: https://www.wcmanet.org/basement-window-replacement/
Posted by: linthoom1978.blogspot.com
0 Response to "How To Install New Basement Window"
Post a Comment